Is It Easy to Use a Router
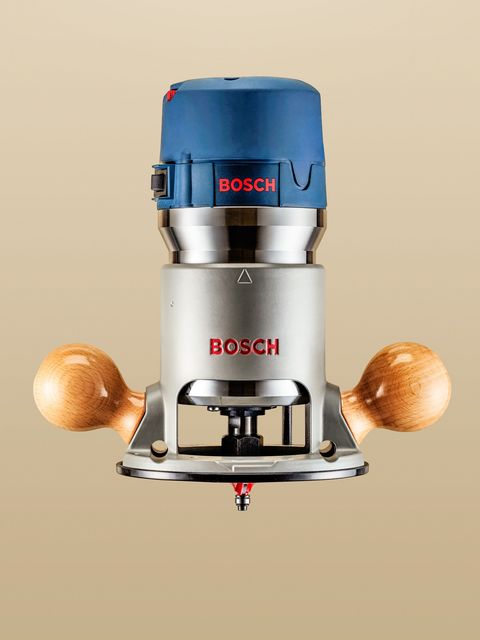
You can make anything with a router and a pile of wood. We didn't go that far with our technique primer below, but you can see how a woodshop workhorse like Bosch's 1617EVS router can contribute to a classic project like a blanket chest. It can cut the dovetails for the drawer or even the case sides. It can cut the groove for the drawer bottom. And it can shape an attractive ogee on the top. For the ultimate in woodworking precision, you can rout each bracket foot to exact shape by running along a template with a top-bearing straight bit.
We love the Bosch's beechwood knob handles. But more impressive is the whopper of a 2 ¼-hp motor that allows you to control its speed with the turn of a red thumbwheel. The Bosch doesn't roar. With a sharp carbide bit, that big motor just purrs as the router leaves a gleaming, crisply shaped edge in its wake. It's a wonderful thing to behold, and as power tools go, it's a classic that makes every amateur look good.
Move to the Right
The biggest mistake novice woodworkers make is advancing the router in the wrong direction. It's easier to practice the correct technique than it is to explain it, but here goes: First, always move the router against the rotation of the bit. That allows the bit to cut into the work, giving you full control over the tool. If you advance the router in the same direction as the bit's rotation, the router will run along the edge of the workpiece and you'll have to fight to keep control.
When looking straight down at the top of a router, the bit rotates in a clockwise direction. That means you should move the router from left to right, but—and this is important—that's only true when the router is positioned in the middle between you and the workpiece.
For example, if you were routing the edges of a board, you'd move the router from left to right across the edge closest to you. But, when routing the opposite edge, the one farthest away, you'd advance the router from right to left. That's because the workpiece--not the router--is now in the middle. In that position, the router is moving right to left, but it's correctly cutting against the rotation of the bit.
Be the Co-Pilot
One of the best and safest ways to begin routing is to use router bits fitted with ball-bearing pilots. The bearing rides along the edge of the workpiece, effectively keeping the bit on course and in control. Simply set the depth of cut and you're ready to rout. There's no need to attach an edge guide to the router or straightedge fence to the work. The bearing alone will ensure the bit cuts to the proper width. Nearly all edge-shaping and trimming bits are available with ball-bearing pilots, including rounding-over, Roman ogee, chamfer, rabbeting, and flush-trimming.
Take the Guided Tour
Once you've mastered basic routing techniques, create a precise milling machine by equipping your router with a guide bushing and straight-cutting bit. A guide bushing (aka template guide) is simply a steel collar that mounts onto the router's base. Protruding from the collar is a short steel tube through which the bit extends. The tube is guided along the edge of a template, allowing you to quickly cut boards to virtually any size or shape. Here's a brief description of how to use a guide bushing:
Start by cutting a template to the desired shape out of plywood, MDF or hardboard. When making a template, take into account the offset between the outside edge of the bushing and the cutting edge of the bit; a distance that's usually about 3/16 in. Also, be sure to sand the template edges perfectly smooth. Otherwise the bit will transfer any imperfections to the workpiece.
Clamp the template in place, then advance the router into the workpiece. Be sure to keep the guide bushing pressed tightly against the edge of the template. Guide bushings are useful for routing curved, irregular shapes, but also for precisely cutting hinges and mortises. You can buy guide bushings individually, but it's usually more economical to buy a multipiece set.
Turn it Upside Down
Mounting your router upside down in a router table greatly expands the tool's capabilities, making routing easier and safer. With the tool held securely in place, you can use both hands to safely feed the stock into the bit. And since the bit is clearly visible, you can see exactly what you're doing. (That's not always possible with handheld routing.) Router tables are especially useful when milling smaller parts, cutting stopped grooves, or using large-diameter bits. In fact there are some bits, including certain raised-panel bits, that should only be used in a router table.
You can make your own router table easily enough, and many table saws have extension wings that accept a router. But for most DIYers, a store-bought router table is the best option since it comes ready-to-use with all the necessary equipment, including an adjustable fence, miter gauge, On/Off switch, dust-collection port and bit guard. However, router tables typically don't come with a router, so check the specs before buying one to ensure your router fits the table.
Claim Your Door Prize
Building traditional frame-and-panel cabinet doors is virtually impossible without a router. The stiles and rails that form the door's frame are joined together with tight-fitting coping and sticking joints. The door's raised panel has beveled edges that fit into shallow grooves cut in the frame parts. The frame is assembled with glue only, so all the joints must be milled precisely for the parts to properly fit together. And the router is the tool to use to cut these joints. You'll also need a router table to safely make the cuts.
Rail-and-stile bits are sold in sets, and raised-panel bits are sold individually. You can also buy cabinetmaking sets, which include all three bits.
Dovetail Details
There are few wood joints as strong or as beautiful as a dovetail. Wedge-shaped pins fit snugly into dovetail-shaped tails, effectively locking the two boards together. Dovetail joints are commonly used to build drawers, blanket chests and jewelry boxes.
And while it is possible to cut dovetail joints by hand, using a router and dovetail template is precise and much faster. A dovetail template is essentially a vise that's equipped with adjustable metal fingers. You clamp the tail board into the template and then use a dovetail router bit to cut the tails. Next, install the pin board into the template and use a straight router bit to cut the pins. It's a little tricky getting all the pins and tails properly aligned initially, so make a few test cuts in scrap wood before routing the workpieces.
Four Ways to Rout
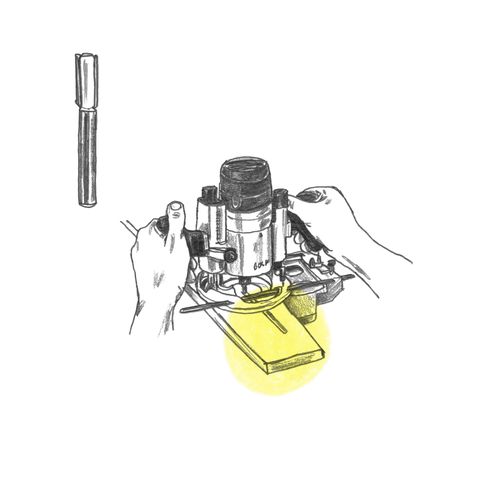
Straight Groove
Grooves appear everywhere in woodworking. For example, use one to seat a drawer bottom in drawer sides, front and back. To make a groove with a router, use a fence accessory. Set the fence the required distance from the bit and set the bit's depth. Not much more to it than that.
Dovetail Joint
Dovetailing with a router requires two things: a dovetail template and a corresponding bit. You perform two operations with the template. With one you cut the dovetail and the other you cut the pins. Push the two parts together with wood glue between them and you have a nearly unbreakable joint.
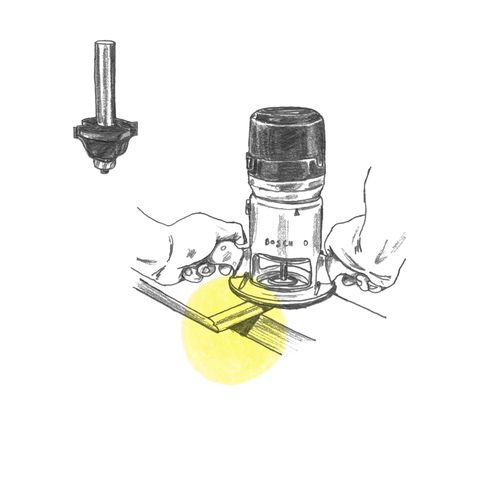
Routered Edge
A router can cut any decorative edge on a workpiece, from a simple rounded corner to a series of curves in a single pass with a Roman ogee bit. These shaping operations may be guided by a ball-bearing bit or a bit minus the bearing. With either method, take a test run on scrap before working on the actual piece.
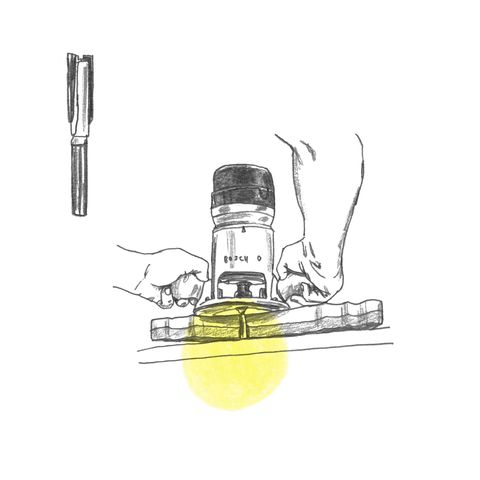
Template Cut
The fastest way to make exact duplicates of a part, such as four bracket feet for a blanket chest, is to use a pattern and a top-bearing straight bit. The bearing rolls along the pattern as the straight bit carves the wood.
This content is created and maintained by a third party, and imported onto this page to help users provide their email addresses. You may be able to find more information about this and similar content at piano.io
Source: https://www.popularmechanics.com/home/tools/reviews/a12241/4301758/


0 Response to "Is It Easy to Use a Router"
Post a Comment